So, you’ve decided to build your first PC and are looking for a build-a-PC checklist. First off, kudos to you! It’s an exciting opportunity to learn about PC technology while building a computer from scratch.
I remember my first build – it was a mix of excitement with a bit of anxiety. But trust me, once you’ve got that baby up and running, it’s a feeling of accomplishment.
Sadly, RAM (memory) and Storage are extremely expensive right now! Once the AI madness stops, we might find prices for these components falling back to earth. However, if you just can’t wait and need a new PC today, I hope this guide is helpful!
Key Takeaways: Checklist for PC Build
Building your own PC is a great way to learn about computers and allows you to troubleshoot any issues that might come up later. Building a PC is something you should be proud of. Additionally, you can customize your new PC to fit your style and needs.
Here are the key takeaways from our Build a PC checklist:
- Plan Ahead: Understand what you need your PC for, whether it’s gaming, video editing, or general use.
- Set a Budget: Set a realistic budget and stick to it. Research the cost of all the components, including the CPU, motherboard, RAM, storage, power supply, case, and operating system.
- Choose the Right Components: Part of planning ahead is selecting components that fit your needs and budget. Make sure all the parts are compatible, such as the CPU, motherboard, and any other components you’ll need, such as a graphics card (GPU).
- Organize Your Workspace: Gather all necessary tools and create a well-organized workspace to streamline the build process.
- Safety First: Follow recommended safety precautions to prevent damage to components or injury to yourself. (i.e., never open the power supply!)
- Cable Management: Properly manage all the connected cables to make sure you have good airflow and a clean-looking build. (Take pride in what you’ve done!)
- Install the OS and Drivers: Once the PC is built, install your operating system and necessary drivers to get it up and running.
What this guide doesn’t cover is “how” to put it all together. So, rather than reinvent the wheel, we offer a link at the end of this article to a great “How to build a PC” video from a well-trusted YouTuber.
PC Build Planning and Preparation
Before assembling your office or gaming PC, take the time to plan and prepare.
Make sure that you have all the necessary components and tools so you’re ready to get started. See the video at the end of this article for an idea of what’s needed.
Make sure the CPU and motherboard are compatible by verifying that the CPU supports the motherboard’s socket type. There is no “maybe” here. It either fits or it doesn’t.
Also, create a checklist of all the PC components you need, including the central processing unit (CPU), graphics processing unit (GPU), random access memory (RAM), storage drives, and the power supply unit (PSU). We cover all these components in detail throughout this article.
Next, gather the tools you’ll need, including a screwdriver, thermal paste, and cable ties. Having a well-organized workspace makes the build process easier.
Define Your Needs
Prioritizing your needs will help you set your budget. For example, if you’re building a gaming PC, you want to assign more of your budget to a high-performance graphics processing unit (GPU) and CPU cooling system.
On the other hand, if you’re building a PC for general use, you can skip the GPU and spend more on other components, such as the CPU, RAM, or storage.
You might even consider buying used to get more for your money or to save overall. You can avoid buyer’s remorse by setting a realistic budget and sticking to it. However, I don’t expect anyone to regret building a new PC!
Set a PC Parts Budget
Once you know your needs, setting a budget helps keep you from overspending. Trust me, it happens!
First, research the costs of all components, including the central processing unit (CPU), motherboard, random-access memory (RAM), storage, power supply unit (PSU), case, and operating system.
If you shop online, don’t forget to factor in additional costs, such as taxes and shipping. However, most top online retailers offer free shipping.
Also, consider the cost of peripherals such as a monitor, keyboard, and mouse, as these can add up quickly.
What to Consider Before Buying PC Parts
Before you start walking the aisles of your local computer store or hitting “Add to Cart” at your favorite online seller, think about what you’ll use your new PC for.
Are you a gamer, graphic designer, or video editor? Or, perhaps you need a basic business-use PC? How you use your PC will help guide your choices.
Building your first PC provides the rewarding experience of assembling a personal computer from scratch.
Again, it’s important to set a budget. It’s easy to get carried away with all the options when building your dream PC.
If you have a Micro Center within driving distance, seriously consider taking a drive and shopping there.
Micro Center is an AMAZING computer parts store with everything you could need. I have one nearby and visit it often, even when I really don’t need anything.
A Build a PC Checklist: The Parts You’ll Need
Here is a list of all the PC components you’ll need to get started, along with how to plan your build.
Computer Case
The computer case is where it all comes together! The case you choose will determine many of the parts you’ll buy.
 There is a lot to consider when choosing a PC case. Are you looking for something big and flashy with lots of LED lighting or something small and basic to tuck under your desk or behind your monitor?
Also, many cases come with pre-installed fans, which help with overall cooling, as good airflow is important for any PC.
If you plan to build the biggest and baddest PC money can buy, you’ll need one that accommodates your graphics card. So, it’s a full tower case for you!
Regardless of the case you choose, be aware that the smaller the case, the more limited your options for selecting PC components that fit within it.
However, don’t let that stop you. There are PC parts to fit every case, so choose one that fits your style and décor.
Tip: Choose your case first so you’ll know what PC components will fit.
CPU (Central Processing Unit)
The CPU is the brain of your computer. It handles all instructions from your software and serves as the “Central Point” among many computer components.
Think of it as the conductor that controls what each section of an orchestra does.
 As we mentioned, think about how you’ll use your new PC. Build a higher-end model if you’re into gaming or heavy-duty tasks like graphics design and video editing. However, if you need a PC for basic office tasks, such as using apps like MS Office or participating in video conferences, consider building a lower-cost PC to save money.
So, once you know how you’ll use it, which brand should you buy? AMD or Intel?
PC tech changes quickly, so the rules may have changed by the time I finish writing this article and you actually read it.
If you’re looking for advice on choosing a CPU or any specific PC part, I suggest searching online to see what other tech professionals like me are saying at the time. As I mentioned, PC technology changes quickly.
If you’re a gamer, search online for tech reviews and benchmarks on how different CPUs perform in some of the top-rated games.
If they perform tests on one or more of the games you play, they’ll show which CPUs offer the best value to performance.
You’d be surprised at how some older CPUs outperform newer models in gaming.
Tip: Generally, a CPU with more cores will likely be better.
CPU Cooler
If you’re building a business PC and your CPU came with a cooler, you should be fine using that one.
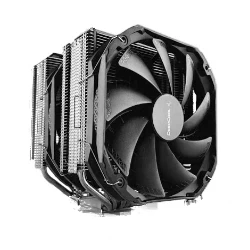 However, suppose you’re building a monster gaming rig. In that case, you’ll want to purchase a separate CPU cooler capable of handling the heat your CPU generates while playing today’s resource-demanding PC games.
With the CPU center stage, keeping your PC cool is essential for it to perform at its best. For example, most CPUs will do what’s called “thermal throttling” if they reach a temperature over 100 degrees Celsius.
Thermal throttling can impact performance and potentially damage your CPU, so maintaining a cool environment is crucial.
CPU Cooler manufacturers provide a TDP (Thermal Design Power) rating, so you’ll know which type to buy.
There are two main types of coolers to consider:
- Air Coolers: These coolers are generally more affordable and easier to install. They use a combination of a heatsink and a fan to draw heat away from the CPU.
If you’re not planning to overclock your processor or push it to its limits, an air cooler might be all you need. They’re reliable, and many come in a variety of sizes to fit different cases.
- Liquid Coolers: This type of cooler, known as an AIO (All-in-One), provides better cooling performance, especially for high-end CPUs. However, there are options for building custom liquid-cooling systems, which we’ll cover in a future article.
These coolers come in a variety of sizes. Here are the most common options:
- 120mm AIO – This is the smallest and most affordable option. It’s best suited for low-power processors or compact PC builds with limited space. A 120mm AIO cooler typically has a single 120mm fan.
- 240mm AIO – A popular choice for mid-range processors. It is still relatively compact and offers better cooling performance than a 120mm AIO cooler. Typically, a 240mm AIO cooler will have two 120mm fans.
- 360mm AIO – The largest of the three standard AIO cooler options. It is best suited for high-end processors or systems with overclocking capabilities. Typically, a 360mm AIO cooler will have three 120mm fans.
These AIO coolers circulate liquid coolant through tubes connected to a radiator.
Just like the radiator in your car, the liquid absorbs heat generated by the CPU and carries it through the radiator, where fans expel it.
Liquid coolers are an excellent option for overclocking and reducing noise, as their fans can operate more efficiently at lower speeds.
When choosing a cooler, make sure it’s rated to cool your CPU effectively and will fit within your PC case.
Personally, I prefer liquid coolers (AIOs). They perform better in my experience and make for a cleaner-looking build.
Tip: If you’re a first-time builder and your CPU supports one, consider an air cooler, as these are easier to install.
Motherboard
The Motherboard is the backbone of your build. And as a shout-out to all those “Mothers” out there, it’s rightly named, as it’s “In Charge” of connecting all your components.
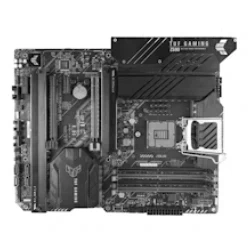 Be sure it supports the CPU you’ve chosen and that it has enough expansion slots for your needs, whether that’s multiple GPUs or RAM modules.
Most modern full-size motherboards offer expansion slots to meet almost everyone’s needs. The exception might be the smaller varieties designed to fit into specialty cases often used for media center PCs or Network Attached Storage Units (NAS).
Also, consider the CPU’s future upgradeability. All motherboard manufacturers will include a list of supported CPUs.
Here are some of the most common motherboard types:
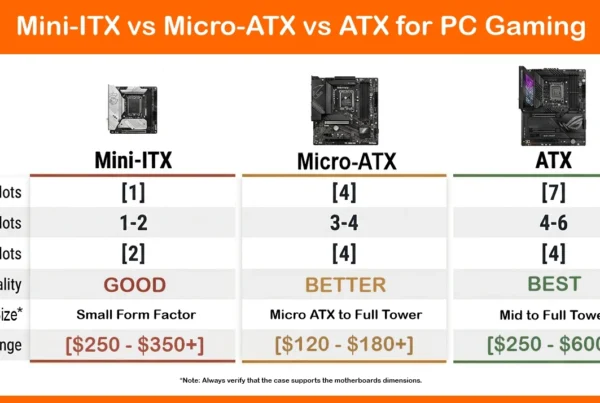
- ATX (Advanced Technology Extended): The most common motherboard form factor for desktop PCs. It offers plenty of space for features like multiple expansion slots, multiple RAM slots, and various connectors. ATX motherboards are an excellent choice for gamers, content creators, and anyone who needs a powerful, versatile PC.
- Micro ATX (µATX): Micro ATX motherboards are smaller than ATX motherboards but still offer most of the same features. They are a good choice for building compact PCs. Micro ATX motherboards typically have fewer expansion and RAM slots than ATX motherboards.
- Mini-ITX (Mini Information Technology Extended): Mini-ITX motherboards are among the smallest and most compact. They are often used in small-form-factor (SFF) PCs. Mini-ITX motherboards have very few expansion slots and may only have two RAM slots.
- Nano-ITX: Nano-ITX motherboards are even smaller than Mini-ITX motherboards. They’re typically used in specialized embedded systems or custom-built Small Form Factor PCs. Nano-ITX motherboards typically have minimal features and often have only one or two RAM slots.
Of course, the larger the Motherboard, the more features and slots you’ll have available for future expansion. So, make sure your motherboard connections meet your needs.
Tip: Purchase the largest Motherboard that will fit in your PC case.
RAM (Random Access Memory)
RAM is your computer’s short-term memory. The more you have, the smoother your PC will run, especially when multitasking. Again, I understand RAM is ridiculously expensive right now, but if you can afford it, the recommended minimum is 32GB if you’re gaming or doing creative work.
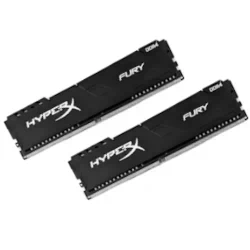
However, if you work with several demanding applications at once or plan to use your PC for Graphic Design or Video Editing, consider buying 64GB or more if it’s within your budget.
Check the recommended system requirements for all your software applications, as these will indicate the amount of RAM needed to run them efficiently.
So, once you start looking, you’ll see memory labels such as DDR4-3200 or DDR5-6400. The “DDR” refers to the technology specification, and the “3200” indicates the memory speed.
These can vary widely, with DDR5 being the latest specification as of this writing. Memory speed is not a significant factor for everyday computing, but it can be crucial for some gaming.
If you’re building a PC for Gaming, I recommend choosing faster RAM, such as DDR5, if it fits within your budget. But be sure the Motherboard you choose supports it.
Also, always use two RAM sticks (Dual Channel). If you choose to go with 32GB total, purchase a 32GB kit that includes 2 x 16GB RAM sticks.
A dual-channel RAM configuration matters for performance, so follow the instructions in your Motherboard manual and install the RAM in the correct slots.
Make sure the memory modules are properly seated and locked in the designated motherboard slots. However, some smaller-form-factor motherboards may only have two slots. In this case, you can’t go wrong.
Tip: Purchase the fastest-rated memory your Motherboard supports. (within budget, of course)
Storage (HDD, SSD or NVMe)
Storage is where all your files and software live. So, what types of PC storage are available?
SSDs and NVMe drives are faster than traditional HDDs, resulting in quicker boot times and faster file transfers.
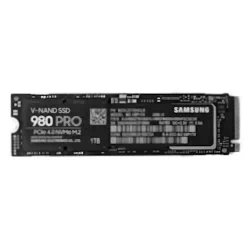 Nowadays, almost no one uses an old mechanical hard drive (HDD) for anything other than extra or Network Attached Storage (NAS).
However, some gamers will use these HDDs as swap drives to store all their games, then move them to their faster SSD or NVMe drives for gameplay.
Therefore, always use an SSD or NVMe drive for your operating system (boot drive). If you need additional storage space, a larger standard HDD is a cost-effective option for a secondary drive.
One thing I’d like to point out is that there are two dominant NVMe specifications. These are Gen 4 and Gen 5.
Like DDR RAM specs, Gen 5 is the newer, faster technology. If your Motherboard supports Gen 5 and you have the budget, purchase a Gen 5 NVMe.
Otherwise, a Gen 4 is backward-compatible and still very fast, so you’ll hardly notice the difference.
Gen 5 is only supported by the latest CPUs and compatible motherboards, so be sure to check before you make a purchase.
Many say it’s never a good time to build or buy a PC, and with today’s RAM and Storage costs, this couldn’t be truer! However, you have to go for it at some point.
Tip: Check the rated speeds and purchase the fastest your budget will allow. Be sure your motherboard supports the “Gen” type.
GPU (Graphics Card)
The GPU is where you’ll connect your monitor to your PC. Before purchasing one, consider how you plan to use your new PC.
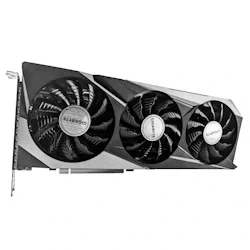 Powerful graphics cards (GPUs) are essential if gaming, working with heavy graphics, or video editing is your thing. High-end GPUs can be pricey, but they’re worth the investment. If this is you, be sure to install the GPU in the PCIe slot closest to the CPU. On almost every Motherboard, this slot has access to the full PCIe lanes supported, so you get the most out of your GPU.
The whole PCIe topic is for another article, but trust me, this is the standard.
I recommend pricing out all the other PC parts first to see what you have left in your budget. Then, buy the best-performing GPU you can afford.
Also, be sure the power supply you choose meets the GPU’s power requirements (in Watts).
The GPU will demand the most power of all other system components. Be sure to check the GPU power requirements. Plus, most manufacturers recommend a minimum power supply for each GPU model.
However, suppose you only need to build a PC for business applications (such as spreadsheets and documents).
In that case, most CPUs (primarily Intel) support integrated graphics, meaning you can use the graphics port directly on the Motherboard to connect to your monitor.
This feature will save you the cost of buying a separate GPU, giving you significant cost savings for your PC build.
So, if you’re not a gamer and don’t need all that graphics power, you may not need a GPU. However, be sure the CPU you choose supports integrated graphics and that the Motherboard supports a video connection, such as HDMI or DisplayPort (DP).
Tip: Modern GPUs are very large. If you do buy a GPU, make sure it will fit in your PC case.
PSU (Power Supply Unit)
The Power Supply Unit (PSU) powers all your components. It’s a key part of any PC build, so be sure to get one that’s reliable and has enough wattage for all the components you choose.
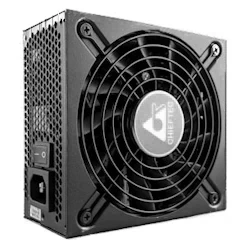
As mentioned earlier, verifying the power requirements for all your PC components is crucial. Make sure the power supply switch is in the ‘on’ position before diagnosing further hardware problems.
I can’t tell you how many times I forgot to turn this switch on after a new build!
However, if you purchase a GPU, choose a power supply that meets or exceeds the manufacturer’s recommendation, as it accounts for all the other standard parts typically included in a gaming PC.
If you base your choice on their recommendation, you should be fine.
My advice is to purchase a power supply rated for at least 100 watts more than the GPU manufacturer’s recommended wattage to give yourself a little headroom.
Additionally, PC power supplies are typically rated for performance and efficiency.
Here are the standard 80 Plus ratings and what each represents:
- 80 Plus (Standard): This is the base level of certification and guarantees at least 80% efficiency at a typical load (50%).
- 80 Plus Bronze: This level guarantees a minimum efficiency of 82% at 50% load, 85% at 20% load, and 82% at 100% load.
- 80 Plus Silver: This level guarantees a minimum efficiency of 85% at 50% load, 88% at 20% load, and 85% at 100% load.
- 80 Plus Gold: This level guarantees a minimum efficiency of 87% at 50% load, 90% at 20% load, and 87% at 100% load. This option is a popular choice among users, as it offers a good balance between efficiency and price.
- 80 Plus Platinum: This level guarantees a minimum efficiency of 90% at 50% load, 92% at 20% load, and 89% at 100% load. It’s more efficient than Gold but also more expensive.
- 80 Plus Titanium: This is the highest level of certification, guaranteeing a minimum efficiency of 92% at 50% load, 94% at 20% load, and 89% at 100% load. It’s the most efficient option, but also the most expensive.
Of course, the higher the tier, the better the efficiency. Typically, an 80 Plus Gold power supply is suitable for almost any PC build.
Tip: Consider the “Modular” variety where you only use the power cables you need. This makes for a nicer-looking build.
Assembly Tools and Accessories
Now, you won’t need any hammers to build your new PC, but there may be moments when you wish you had one! (Just kidding)
The basic tools you’ll need are a screwdriver, thermal paste for the CPU cooler (if it’s not pre-applied), and some cable ties for neatness.
Consider adding a PC toolkit to your pc build checklist so you know you have everything you need.
Safety Precautions
Safety should be a top priority when building a gaming PC, or any PC for that matter, to prevent damage to components and avoid injury. Here are some essential safety tips to keep in mind:
- Ground Yourself: Static electricity can damage sensitive PC components. Ground yourself by touching a metal object or wearing an anti-static wrist strap before handling any parts.
- Handle with Care: Always handle components by the edges to avoid touching electrical pins or contacts, which could damage these components.
- Well-Lit Workspace: Make sure your workspace is well-lit and well-ventilated. This helps prevent overheating and reduces the risk of electrical shock.
- Avoid Loose Clothing: Loose clothing or jewelry can get caught in components or tools, posing a risk of injury. Wear fitted clothing and remove any jewelry before starting.
- Keep the Area Clear: Keep children and pets away from your workspace to prevent accidents.
Following these safety precautions lets you build your work or gaming PC without distractions while avoiding costly mistakes.
Putting All the PC Parts Together
Now that you understand which parts you’ll need to build your PC, here is an excellent, easy-to-follow video showing how they all go together.
Final Cable Management
Once you have everything together, it’s time to do some cable management. By organizing all the cables, you’ll prevent airflow restriction and keep everything looking nice and tidy.
Use cable ties to secure cables to the case or motherboard tray. Route cables behind the motherboard tray or through the designed cable-management channels to keep them clear of other components, such as system fans.
You might even consider a third-party cable management kit with built-in clips for a more professional look.
It takes little effort to properly manage all the cables. Plus, your PC build will look much better and will be something to be proud of!
Power on the PC and Configure the BIOS
Once everything is connected, power on your PC and enter the BIOS setup to configure your boot order and check that all components are detected.
In almost every instance, you’ll tap the “F2 or “Del” key during startup to open the system’s BIOS. If these keys don’t work, check the motherboard manual for instructions on accessing the BIOS.
If you have installed more than one storage device, make sure that the one you want to use as the boot drive is at the top of the boot order.
Also, make sure you enable XMP (for Intel CPUs) or EXPO (for AMD CPUs) to maximize your RAM’s rated speed for the best performance.
Most motherboard manuals include instructions for checking these settings. If not, there are tons of resources online that will show you what to look for.
Install the Operating System
Once you have the BIOS configured, you’ll need to install your OS of choice from a USB drive or disc.
There are a few operating systems to choose from. However, I will assume you want to install Windows.
You can download the latest Windows version directly from Microsoft, along with installation instructions.
Once the installation starts, follow the prompts to get your new PC up and running.
Also, if you don’t already have one, you’ll need to purchase an activation key for the Windows version you installed.
Installing Drivers and Software
Once you’ve installed the operating system of your choice, you’ll want to install the PC component-specific drivers and software to optimize performance. This is especially true with the GPU drivers.
Here are the items to consider:
- Install Drivers: Install the drivers for your graphics processing unit (GPU) and all other components that require specific drivers. These drivers are necessary to fully utilize a device’s features, such as a gaming mouse with programmable buttons.
- Install Your Software: Next, install any software you use. This could be an office suite or a gaming platform, such as Xbox Live.
- Update Everything: Finally, check for updates to your OS and any installed software. These updates will make sure you have the latest security patches and features to keep your system secure.
These steps will make sure your PC is up to date, secure, and ready for use.
Final Steps and Troubleshooting
After assembling and installing the necessary drivers and software, it’s time to test your new PC and troubleshoot any issues.
Here are some steps to follow:
Testing and Troubleshooting
- Enter BIOS Settings: Turn on your PC and enter the BIOS to verify that all components are recognized and configured correctly. This is also a good time to enable XMP (Intel) or EXPO (AMD) to optimize your system RAM’s performance.
- Run a Benchmark Test: Test your PC’s performance using benchmarking software, such as 3DMark or Cinebench. These utilities will give you a clear idea of how well your system performs under different conditions and also help identify any potential issues with your cooling system or power supply.
- Troubleshoot Issues: If you experience overheating, crashes, or poor performance, it’s time to troubleshoot. Check that the CPU cooler is installed correctly and that all power supply connections are made. Many motherboards include error code displays or LEDs to help you troubleshoot issues.
- Search Online Resources: If you’re unable to resolve an issue on your own, try checking popular online forums, user manuals, and technical support resources. Trust me, any problem you might have is likely something others have had to sort out, and many are willing to share their troubleshooting solutions.
Troubleshooting may take some time, but it’s an essential part of the PC building process and a great way to learn more about PC technology.
Peripherals and More
While we don’t include these in our build-a-pc checklist, you’ll need a monitor, keyboard, mouse, and speakers to make your PC fully functional.
These peripherals are an important consideration when finishing your build. If you choose poorly, it can make or break a good computer system.
If you’re shopping at brick-and-mortar stores such as Micro Center, you can try a few keyboard-and-mouse combinations to find one that feels right.
Otherwise, YouTube is full of trusted product reviews that will give you details about how they respond and feel.
Avoid the generic “unboxing” videos, as they’re just fluff. Look for a reviewer who dives deep into build quality and performance.
Now, when choosing a monitor, there are some things to consider. If you’re deep into spreadsheets all day, consider a larger, high-resolution display like QHD or 4K.
A good business monitor around 32″ should cost between $250 and $500.
However, if you’re a content creator where color accuracy is critical, expect to pay well over $1,000 for a top-end model.
If you’re a gamer, the selections are endless. You’ll want a monitor with a fast response time and a high refresh rate.
Look for monitors rated for 1ms response time or less and a refresh rate of 120Hz or higher. Of course, size is a personal preference, so choose what best fits your space.
However, panel type is also worth considering.
Here are a few to consider:
- OLED monitors: Offer the best picture quality, with perfect blacks, infinite contrast ratio, and very fast response times, but may be subject to image burn-in and are the most expensive.
- QLED Monitors: These are also good for gaming and produce vibrant colors and good contrast ratios, but they are not as good as OLEDs and have a lower risk of image burn-in.
- LED Monitors: These are the most common and affordable monitors that use backlight technology. They’re available in several different panel types. IPS panels offer the best viewing angles, VA panels offer good contrast but lower viewing angles, and VA panels offer the fastest response times, which is why some gamers prefer them. However, the viewing angles are awful.
Final Thoughts – Build A PC Checklist
Building a PC is a rewarding experience that allows you to customize your machine to your style and needs.
A DIY PC build can save you money compared to buying a pre-built PC. Additionally, you’ll gain a deeper understanding of how your computer works and learn how to troubleshoot any issues you might have in the future.
We hope you found this PC checklist helpful as you start your first PC build.
Plus, once you’re done, you can say, “I built that!” and who doesn’t like to take some pride in any personal achievement!
Questions New PC Builders Ask
How do I know for sure if my CPU and Motherboard are compatible?
While the guide mentions checking the socket type, readers often worry about the specifics. You can verify this by checking the motherboard’s box or its website for the socket name (e.g., LGA1700 for Intel or AM5 for AMD). A popular pro-tip is to use a tool like PCPartPicker, which automatically flags compatibility issues between your chosen CPU, motherboard, and even your BIOS version.
If my RAM and Storage are “ridiculously expensive” right now, can I start small and upgrade later?
Absolutely. One of the best perks of building your own PC is expandability.
-
RAM: You can start with 16GB (one or two sticks) and add more later, provided your motherboard has extra slots.
-
Storage: You can start with a single 500GB NVMe drive for your OS and apps, then add a larger SSD or HDD later when prices drop.
What should I do if I turn the power on and nothing happens?
Don’t panic! This is a “rite of passage” for first-time builders. Check these three common causes first:
-
The PSU Switch: Make sure the physical I/O switch on the back of the power supply is set to “I” (On).
-
Front Panel Connectors: Check that the tiny connectors from your case (the power button) are plugged into the correct pins on the motherboard.
-
RAM Seating: Verify your RAM sticks are clicked all the way in; they often require more force than you’d expect.
Is thermal paste really necessary if my cooler already has it?
If your CPU cooler comes with pre-applied thermal paste (usually a grey square or circle on the bottom of the metal block), you do not need to add more. In fact, adding extra can cause a mess and actually decrease cooling efficiency. You only need to apply your own paste if the cooler base is bare shiny metal.
Do I need to buy a separate sound card or Wi-Fi card?
Usually, no.
-
Sound: Almost all modern motherboards have high-quality onboard audio.
-
Wi-Fi: Many motherboards now include “Wi-Fi” in their product names and built-in wireless chips. If the motherboard doesn’t specify Wi-Fi, it will only have an Ethernet port for a wired connection, in which case you would need a separate USB or PCIe Wi-Fi adapter.