
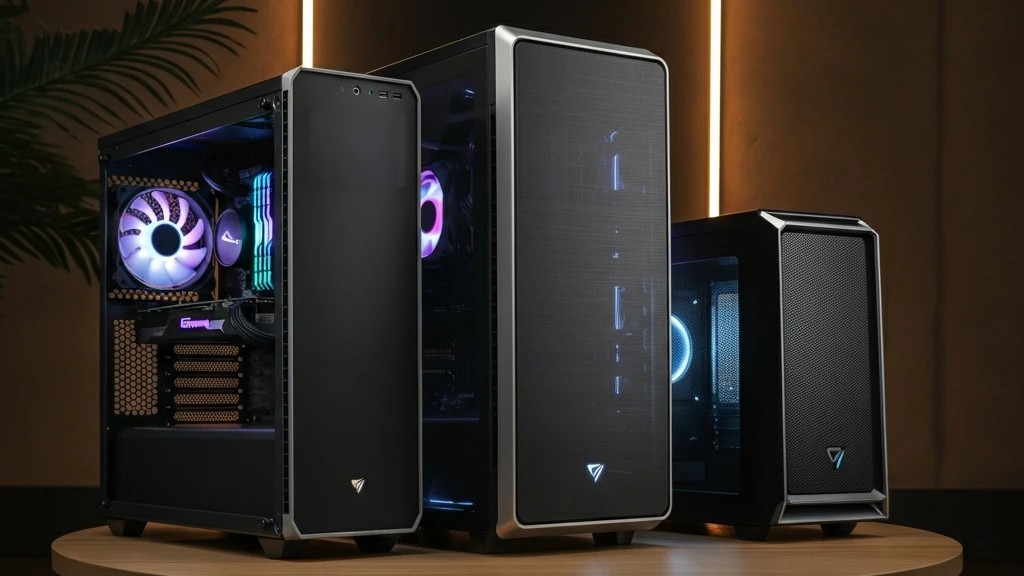
When choosing a PC case, be sure it’s large enough for the parts you plan to use. Confirm your motherboard’s form factor (ATX, Micro-ATX, or Mini-ITX) fits, and that your GPU length and CPU cooler height fit within the case’s maximums.
I recommend mesh front panels for better airflow, but that’s a personal choice. Budget $100–$200 for a decent mid-tier case with popular options that balance cooling, cable management, and looks.
Whether you’re building your first PC or your fifth, it always starts with the same question: which case do I buy? And honestly, it’s one to consider carefully.
Think of your case as being more than just a box that holds your parts. It determines airflow, how components fit, your cable management options, and yes, it’s the thing sitting on your desk that you’ll stare at every day. So it’s worth careful consideration.
This guide walks you through everything — from form factors and airflow to RGB and front-panel ports — so you can make a smart, informed decision before you spend a single dollar.
Key Takeaways
Key Takeaways
Before you start browsing, keep this shortlist in mind:
- Pick your case first. It’s easier to choose components that fit a case than vice versa.
- Match your form factor. Confirm the case supports your motherboard size before anything else.
- Check GPU length AND slot width. Modern top-tier GPUs are wide. Make sure the case has enough expansion slots.
- Verify CPU cooler clearance. Tall tower coolers and low-profile cases don’t mix well.
- Prioritize mesh for airflow. If thermals matter to your build, mesh front panels are the safer choice.
- Aim for balanced airflow. At minimum: two front intake fans + one rear exhaust fan for gaming builds.
- Go 140mm when you can. Better airflow-to-noise ratio than 120mm fans.
- Use a modular PSU. Your future self will thank you during cable management.
- Spend in the $100–$200 range for the best balance of features and quality for most builds.
- Stick with established brands. Corsair, Fractal Design, NZXT, Thermaltake, and Antec are all strong choices.
Whether you’re building a desktop computer for gaming, content creation, or general computing, have fun and make it your own!
Before You Start PC Part Shopping
Before you click “Add to Cart” on anything, be prepared to avoid costly mistakes.
- Set your budget first. Cases range from under $50 to well over $500, and the price range often reflects quality and how easy it will be to build in it. You don’t need to go high-end for a quality build, but you will notice the difference between a $60 and a $250 case regarding its build quality, cable routing, and cooling options.
- Know your motherboard size. This is the single most important compatibility check. Your case must support your motherboard’s form factor. If you haven’t picked your motherboard yet, decide on that first. Everything else flows from there.
- Think about your cooling setup. Are you planning to overclock? Running a high-powered GPU? You’ll need a case that supports multiple fans and, ideally, AIO or custom liquid cooling. Not all cases offer the same options, so don’t assume and always check the specs.
- Consider your space. A full-tower case is impressive, but not if it doesn’t fit under your desk or looks ridiculous in a dorm room. Measure your available space before you commit to a case.
Of course, features come with a cost. You’ll find many computer cases that fit your budget if you focus on the features you need.
PC Case Form Factors: Which Should I Use?
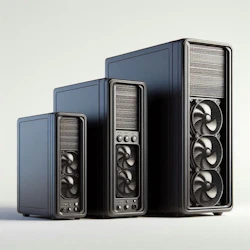
The form factor tells you how big the case is and which motherboard sizes it supports, such as ATX, Micro-ATX, or Mini-ITX. This is the starting point of every build decision, as it determines not only the size of your build but also how many components you can fit inside, including graphics cards, storage drives, and cooling solutions. Choosing the right form factor early on will save you from compatibility headaches down the road.
Here’s a breakdown of the main options:
| Form Factor | Typical Height | Motherboard Support | Best For |
| Full Tower | 22–27 inches+ | E-ATX, ATX, Micro-ATX, Mini-ITX | Enthusiast/workstation builds, custom water cooling |
| Mid-Tower | 17–19 inches | ATX, Micro-ATX, Mini-ITX | Most gaming and general-purpose builds |
| Mini Tower (MicroATX) | 14–17 inches | Micro-ATX, Mini-ITX | Budget/compact builds with mainstream components |
| Mini-ITX | Under 14 inches | Mini-ITX only | Small form factor, LAN party rigs |
| E-ATX Specialty | Varies (22″+) | E-ATX and larger | Multi-GPU, high-end custom loop builds |
Full Tower cases are large — typically 22 inches tall and up. If you’re building an extreme enthusiast rig with a custom water loop, multiple GPUs, or an E-ATX motherboard, this is where you should be looking. That said, most people don’t need this much room.
Mid-Tower is the sweet spot for most PC builders. At 17–19 inches tall, these cases support full ATX motherboards and leave plenty of room for cooling, storage, and cable management.
Mini Tower (MicroATX) cases keep things compact. You lose some flexibility on what parts will fit, but you save desk real estate. This is a good option if you’re not running power-hungry hardware like a cable-melting GPU!
Mini-ITX builds are for people who genuinely want the smallest possible footprint. They look incredible when done right, but thermal management is harder, and finding parts that fit is more difficult. Expect to pay a premium for Mini-ITX-compatible parts.
E-ATX specialty cases are niche. Unless you know you need one, you probably don’t.
Quick tip: If you’re unsure which form factor to pick, go mid-tower. It’s the most versatile option for most builds and leaves room to grow.
PC Case Size and Dimensions
 Size matters, in more ways than one! Every case lists internal clearances: maximum GPU length, maximum CPU cooler height, radiator support sizes, and the number of drive bays, with many showing where parts like AIO radiators fit and which standard sizes they support.
- Airflow Considerations: Bigger cases usually mean better airflow, which helps keep things cool. Not all PC cases offer the same airflow, so smaller cases can be more restrictive and lead to overheating.
- Component Compatibility: Always check if your motherboard, GPU, and other components will fit. There’s nothing worse than realizing your shiny new graphics card is too long. A mid-tower case is popular for its balance of size and capacity, accommodating various motherboard types, including ATX and Micro-ATX.
- Usage Guidelines: If you’re a gamer or run demanding applications, use a larger case with good cooling options. For basic tasks, a smaller case might be enough. Small-form-factor cases are an option for those looking to save desk space, though they limit the components they can support.
Why does this matter? Because a GPU that’s 1mm too long won’t fit, no matter how much you want it to. And a CPU cooler that’s 3mm too tall means your side panel won’t close. It’s never fun when you’re that far into your build, only to find out you can’t close the case.
Quick Tip: Consider picking the largest PC case that fits within your budget and space.
PC Airflow: Mesh vs. Tempered Glass
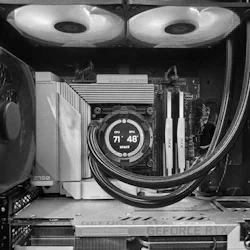 Ever use a laptop with it sitting on your lap, and then it gradually gets too hot to keep there? That’s bad airflow. For desktop PCs, good airflow is the difference between a PC that runs cool and quiet and one that throttles itself when it runs too hot.
Why it matters:
- PC Performance: Good airflow keeps your components cool, boosting performance and lifespan. Overheating can cause throttling and crashes, especially on a high-end gaming PC.
- Design Features: Look at cases with mesh panels, multiple fan mounts, and space for liquid-cooling setups if you dare to try! Not all PC cases offer the same airflow capabilities. Just remember: airflow and glass don’t play well together.
- Restrictions: Avoid cases with solid front panels or glass panels that limit airflow. They might look cool, but they do restrict airflow.
- CPU and GPU Cooling: These are your hottest components. Make sure your case has enough fans to keep your PC cool during those gaming sessions. Also, choose a case with room for an adequate cooling solution for your hardware.
That said, a well-designed glass-front case with bottom and top venting and proper fan placement can still perform well, just not as well as a mesh case with the same airflow setup.
Positive vs. Negative Air Pressure
Here’s something most beginner guides skip: fan configuration affects more than just airflow. It also affects air pressure.
- Positive pressure means more intake fans than exhaust fans. Air is pushed out through gaps and vents. This reduces dust buildup but can result in slightly higher component temps if exhaust is insufficient.
- Negative pressure means more exhaust fans than intake fans. Air is drawn through every gap and crack, which can pull in dust from unfiltered areas.
- Balanced pressure — equal intake and exhaust — is generally the target for most builds.
For a gaming build, a solid baseline is two intake fans at the front and one exhaust fan at the rear. Add top exhaust fans if your case and cooling solution support it.
Quick Tip: Fan size matters too: 140mm fans generally move more air at lower RPMs than 120mm fans, which makes them quieter for equivalent airflow. If your case supports 140mm fan mounts, they’re usually worth using.
PC Cooling Solutions

You have three main choices: air cooling, liquid cooling, or an AIO cooler. Each has real trade-offs.
- Air cooling uses heatsinks and fans to pull heat away from components such as the CPU. It’s reliable, cost-effective, and easy to install. Most cases come with at least one pre-installed fan. The main limitation is that large air coolers can be very tall, so always check your case’s CPU cooler height clearance before buying.
- Custom liquid cooling uses a pump, reservoir, tubing, and a radiator to move heat away from components via coolant. It can be highly effective for overclocked systems and looks spectacular in a case with a glass panel. That said, setup is complex and requires careful planning and patience. Plus, these cooling systems require ongoing maintenance. Maybe not the best option for a first-time builder.
- AIO (All-in-One) coolers are the middle ground, pre-filled closed-loop liquid coolers that mount like air coolers but cool like liquid systems. This is the way I usually go when building a system. They’re easy to install, require no maintenance, and come in 120mm, 240mm, 280mm, and 360mm radiator sizes. Before buying an AIO, make sure your case supports the radiator size you’re considering since not all top or front mounts are created equal.
Choosing the right cooling solution depends on your performance needs, budget, and willingness to manage maintenance. Whether you go for air cooling, liquid cooling, or an AIO cooler, make sure your case supports your choice so you have a build to be proud of!
Quick Tip: “If you’ve chosen an AIO cooler, airflow over the CPU socket area is less of a concern since the AIO handles that. Instead, focus on case fan placement to make sure hot air from your GPU has a clear exhaust path.
Drive Bays and Storage
This section is less exciting than RGB lighting but still worth getting right, as drive bays and storage options are also important considerations.
Today’s systems are designed for M.2 NVMe SSDs, which mount directly to the motherboard so no drive bays are needed. Many cases include them anyway, as some builders use 2.5-inch SATA SSDs or 3.5-inch mechanical hard drives for more affordable bulk storage. And with today’s prices, I mean “affordable” relatively speaking.
Here are some things to keep in mind:
- Drive Bay Types: If you still use traditional SSDs and HDDs, look for cases with 2.5-inch and 3.5-inch drive bays to accommodate both. This flexibility allows you to use both SSDs and mechanical hard drives.
- Storage Capacity: Consider the number of drive bays and the overall storage capacity you need for your build. If you plan to use multiple drives, make sure the case has enough bays to support them. This capacity is important if you’re building a DIY NAS unit.
- SSD Mounting Points: Look for cases with dedicated SSD mounting points or caddies for easy installation. These mounting points often simplify cable management and improve airflow within the case.
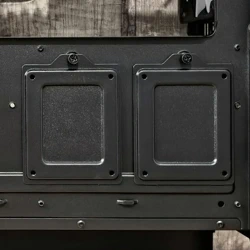
If you plan to use that old-school storage, check how many 3.5-inch and 2.5-inch bays the case includes, because some cases don’t have bays to support these drives properly. However, don’t overlook SSD mounting points and small brackets or caddies behind the motherboard tray. They keep your drives organized and out of the case’s airflow path.
Will Your PC Parts Fit?
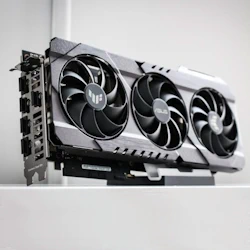
This is where many first-time PC builders make mistakes. Graphics Cards (GPUs) and CPU coolers are the usual culprits. Some high-end models are enormous and won’t fit in smaller, shallow PC cases. Don’t be that person who buys a beautiful case only to realize the GPU they bought is 15mm too long. An oversized GPU won’t fit into a compact case.
GPU Length and Slot Width
Every case lists a maximum GPU length in millimeters. Compare this to the length spec of the GPU you’re buying. Sounds simple… right? Here’s what most guides miss:
Modern high-end GPUs like the Nvidia RTX 40 and 50 series, or AMD RX 7000 and 9000 series GPUs, aren’t just long… they’re also thick. Many can take up 3 or even 4 expansion slots in terms of height. Your case needs enough expansion-slot clearance at the rear to physically allow for the card’s thickness.
Quick Tip: Always check the case’s listed expansion slot count to verify your GPU’s slot width will fit.
CPU Cooler Height
Cases list a maximum CPU cooler height clearance in millimeters. Big tower air coolers such as the Noctua NH-D15 or be quiet! Dark Rock Pro can hit 165mm or more. If your case only clears 155mm, you’ve got a problem. And sometimes, even within the clearance spec, tall RAM with large heat spreaders can create secondary fitment issues. Be sure to measure everything.
Quick Tip: Choose your case before buying any other components. It’s far easier to pick parts that fit a case than to find a case that fits parts you’ve already bought.
PC Cable Management
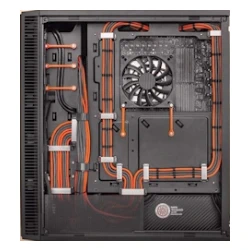
Clean cable management is as much about airflow as it is about looks. Cables stuffed randomly across a case restrict airflow and make future maintenance a nightmare.
- Why It’s Important: It improves airflow and makes your PC easier to work on. Plus, it helps avoid accidental disconnections.
- Helpful Features: Look for cases with built-in cable routing channels, tie-down points, and plenty of grommets. These make keeping things tidy a breeze.
- Extra Cable Ties: Consider buying extra cable ties to make things neat and tidy. Even if you’re the only one who will see it.
You can eliminate some of these cables by choosing the right power supply. Modular cables are your best friend.
Quick Tip: Use a modular power supply so you only need to use the cables required.
PC Design and RGB Lighting

Look, functionality comes first, but there’s absolutely nothing wrong with wanting to personalize your builds with some RGB lighting. That’s part of the fun.
Tempered glass side panels let you see inside your case, so your PC-building skills and RGB lighting are on display for all to see. If you’re going with a “fishtank” case, spend the extra time on cable management.
RGB lighting ranges from subtle accents to full-on light shows. Most modern cases and fans support ARGB (addressable RGB), which gives you per-LED control through your motherboard’s software. If you’re going heavy on RGB, make sure your motherboard has enough ARGB headers, or that your fans come with their own RGB controller.
Color and style come down to personal preference. Minimalist all-black cases like those from Fractal Design are popular for clean desk setups. Bold, windowed panels with RGB fans are popular in gaming builds. Go with what fits your style.
Quick Note: If you’re a case modder or planning a custom themed build by adding custom panels or a troll doll standing under your GPU, make sure you’re not restricting airflow.
Connectivity and Front-Panel Ports
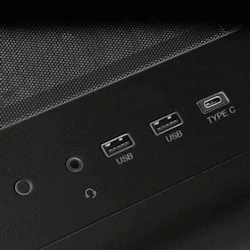
This is easy to overlook and genuinely annoying to regret. Your front-panel ports are how you quickly connect peripherals, headphones, and external drives without reaching around the back of your PC.
Here’s what to look for:
- USB-A ports — at least two is standard; more is better
- USB-C port — increasingly important, especially for today’s peripherals and fast data transfer. Look for USB 3.2 Gen 2 (10Gbps) at minimum on mid-range and premium cases.
- 3.5mm audio jack — a front-mounted headphone/mic combo jack is a small feature with outsized daily-use value
- Power and reset buttons — obvious, but check they’re accessible and feel solid
Some higher-end cases add SD card readers or removable front storage bays. Nice to have, but not essential for most builds.
Additional Case Features Worth Noticing
Some features often get buried in spec sheets but can make a real usability difference:
- Swappable drive bays let you add or remove drives without tools, which is useful when you’re upgrading storage later.
- Removable dust filters make maintenance easy. Mesh-front cases in particular pull in a lot of air (and dust with it). Removable, washable filters help keep your internal components cleaner for longer. However, some case layouts make removing these filters difficult, like bottom filters that pull out from the rear of the case.
- Tempered glass panels are more durable than acrylic alternatives. They resist scratching better and maintain their clarity over time. If you’re buying a windowed case, tempered glass is worth the slight cost premium.
- Tool-less design features like thumbscrews on the side panel or snap-in drive caddies can make future maintenance and upgrades much easier.
Quick Tip: There is a PC accessory for almost anything—external drive bays, USB hubs, etc.
PC Budget and Cost Considerations
Here’s what you can expect based on what you’re planning to spend:
- Under $100: You’ll find functional cases that cover the basics such as required fan mounts, basic cable routing, and standard port options. Build quality can feel plasticky, and premium features like tempered glass or modular drive bays are rare. However, I used the Corsair 4000D RS ARGB for my last build and found it an excellent-looking case that was easy to build in. Plus, it included three front RGB fans all for under $100 when I bought it!
- $100–$200: This is the sweet spot for most builders. You get purpose-designed airflow improvements, better cable management features, tempered glass panels, and often pre-installed fans. Build quality is a step up. Cases like the Fractal Design Meshify 2, NZXT H5 Flow, and Corsair 4000D Airflow fall in this range and are consistently well reviewed.
- Over $200: Premium materials, advanced cooling support, modular internal layouts, and top-tier build quality. These cases are built to last and typically offer extensive customization options. It’s worth it for a high-end gaming build when budget is less of a factor.
With so many choices nowadays, you’ll find one that works for you and offers the best value for your money.
Popular PC Case Brands
There are many PC case manufacturers on the market, but some brands stand out for their quality and features. Here are some popular PC case brands:
- Corsair: A well-known brand in the PC hardware industry, offering a wide range of PC cases with advanced features and high-quality construction. Their cases are known for excellent build quality, innovative designs, and robust cooling options. Whether you’re building a budget system or a high-end gaming rig, Corsair has a case that fits your needs.
- Thermaltake: Another popular brand offering a wide range of PC cases with unique designs and features. They are known for their bold aesthetics and extensive support for liquid cooling. Thermaltake is a solid choice if you want a case that stands out and offers good cooling performance.
- Antec: Antec is a long-time brand making a comeback and has quickly regained a reputation for its high-quality PC cases with advanced features and effective cooling. Their cases often feature excellent cable management, modular designs, and premium materials. Antec has always been a favorite among PC enthusiasts who appreciate both form and function.
- Fractal Design: A popular brand among PC enthusiasts, offering a wide range of PC cases with advanced features and high-quality construction. Known for their minimalist and elegant designs, Fractal Design cases are perfect for those who prefer a clean, understated look without compromising on features.
- NZXT: A well-known brand in the PC hardware industry, offering a wide range of PC cases with advanced features and high-quality construction. Their cases are known for their modern aesthetics, excellent build quality, and user-friendly designs. NZXT cases often feature built-in RGB lighting and innovative features, making them popular among PC gamers.
Choosing a case from a reputable brand ensures you get a quality product with good support and a range of features to suit your build.
PC Case Comparison Table: Form Factor at a Glance
| Feature | Mini-ITX | Micro-ATX | Mid-Tower (ATX) | Full Tower |
| Typical Height | Under 14″ | 14–17″ | 17–19″ | 22″+ |
| Max Motherboard Size | Mini-ITX | Micro-ATX | ATX (some E-ATX) | E-ATX |
| GPU Clearance | Often limited | Moderate | Good | Excellent |
| Cooling Options | Limited | Moderate | Good | Excellent |
| Fan/Radiator Support | 1–2 fans | 2–3 fans | 3–6 fans | 4–9+ fans |
| Cable Management | Tight | Moderate | Good | Excellent |
| Best For | Compact/travel builds | Budget/mid builds | Most gaming builds | Enthusiast/workstation |
| Typical Price Range | $80–$200+ | $50–$150 | $70–$300+ | $150–$500+ |
Final Thoughts – How to Choose a PC Case
When you choose a PC case, it’s about balancing form and function. Decide what options matter most to you and plan your PC build accordingly.
Make a list and consider everything, including form factor, size, airflow, compatibility, cable management, aesthetics, and any extra features you might need, such as easy front-panel access to USB and Audio ports.
Take your time and plan it right. While I’m just one source for advice, make sure you read reviews and seek advice from several other sources before you begin.
Having a better understanding of what goes into choosing a PC case will help prevent regret later.
After all, you’re not just buying a case but creating a “Personal” computer that fits your style.
So, what kind of PC are you planning to build? We’d love to hear from you. Leave us a comment below.
Questions I’m Often Asked About PC Building
What’s the most important thing to check before buying a PC case?
Motherboard compatibility. Your case must physically support your motherboard’s form factor. After that, check GPU length, GPU slot thickness, and CPU cooler height clearance. These three fitment checks prevent the most common mistakes.
Is a mesh front panel really that much better than tempered glass?
For thermals, yes — generally. Mesh panels let intake fans draw air with minimal resistance. Tempered glass panels often restrict intake airflow to narrow side channels, which can raise component temperatures. The temperature difference depends on the hardware and configuration, but in a high-powered gaming build, it can be meaningful. If you want the glass look but need cooling performance, look for hybrid designs with side venting.
Can I put a Mini-ITX motherboard in a mid-tower case?
Yes, technically. Most mid-towers have mounting holes for smaller form factors. The board will fit and function normally. That said, the case will feel sparse inside, and some front-panel cables may not reach comfortably. Most PC builders prefer to match case size to motherboard size for a cleaner result.
How many fans does a gaming PC case need?
At minimum, you should have two intake fans at the front and one exhaust fan at the rear. That’s the baseline balanced setup. For high-end components or overclocked systems, adding top exhaust fans (if supported) will improve cooling performance. If your case only ships with one fan, plan to buy two additional 120mm or 140mm fans.
What’s the difference between positive and negative air pressure in a PC case?
Positive pressure means you have more intake fans than exhaust fans — air is pushed out through gaps, which reduces dust inside the case. Negative pressure (more exhaust than intake) draws air through every crack, which can pull in unfiltered dust. Most experienced PC builders recommend balanced or slightly positive pressure. Most first-time PC builders overlook this.
Do I need to spend over $200 on a case?
Not for most builds. The $100–$200 range covers the features that matter most — good airflow, solid cable management, and decent build quality. Over $200 makes sense for premium builds where the case is a centerpiece, or where you need design features that support liquid-cooling loops, such as reservoir mounts and loop drain plugs.
What’s the best PC case brand for first-time builders?
NZXT and Fractal Design are consistently recommended for first-time builders. Both offer clean internal layouts, clear documentation, and first-time builder designs that make PC building less intimidating. Corsair is also an excellent choice with a wider range of price points and styles.



I learned the hard way about GPU clearance! Always double-check the specs of both your card and the case!
Exactly! Measure twice and then again, just for good measure! 🙂 Today’s GPUs are massive! I also consider leaving enough space in the case for a future GPU upgrade, although I can’t imagine how much larger they could get.
I went for a really flashy glass case and while it looks cool, the airflow isn’t great and my AIO stuggles to keep my CPU cool. Any suggestions on fan layout? I’ll definitely prioritize function over form next time.
Every case will be different and fan placement makes a big difference in airflow. If you’re using an AIO, as you said, airflow over the CPU is less important.
Additionally, if you’re using a high-end GPU that generates significant heat under load, consider a bottom-to-top fan configuration. If your case supports bottom-mount fans, draw air in from the bottom and out the top, as heat naturally rises.
There are numerous informative videos on YouTube that experiment with various fan placement options.
I’ve been on the fence about what case to buy for my first PC build. This was helpful, especially about makign sure it all fits! I’m thinking about a mid tower and hadn’t really given that much thought. Until now! 🙂
Most cases will list what motherboard sizes they support as an obvious spec. Some less obvious are AIO radiators and tower cooler clearences. I once assumed a tower cooler would fit, but not only was my RAM too tall, the case was too narrow to allow me to put on the side panel. Needless to say, I returned it for another option that fit! 🙂
Nice detailed guide! Regarding case airflow, do you have any recommendations for cases that balance good airflow with quieter operation?
The choices are endless. I’ve built several systems using all sorts of case designs. Those with the standard three front fans and a glass side panel, and the “fish tank” style with a glass front and side that uses a bottom-to-top fan configuration for a chimney-like airflow design.
However, my last build was in the new “Corsair Frame 4000D“. This case has the best air flow of any other case I’ve used and keeps everything much cooler than I expected. However, with the case being more open and mesh, the fan noise is more noticeable, but that seems to be the trade-off vs cases wrapped in glass.